Showing posts with label food. Show all posts

Thursday, January 30, 2014

Lemon Curd

So I was browsing through lemon cupcake recipes and came across this recipe for microwaved lemon curd. I linked it on facebook and joked that if it worked I'll be gaining 10 pounds in the next week.  It's a good thing it is going to be warmer this week so I can go to the gym and work off the coming calories because this was amazingly easy and good.  I only have a few pictures because I didn't think to when I started.

Lemon Curd:
1/2 cup unsalted butter 
1 1/4 cups granulated sugar
3 eggs
1 egg yolk
1 cup fresh lemon juice (about 6 juicy lemons)
lemon zest from 3 lemons (I highly recommend this article, if you haven't read it)


  • Melt butter in microwave, set aside to cool slightly.
  • Whisk together sugar and eggs in a medium-sized microwave-safe bowl. (I would use a large bowl so you have room to whisk - my stove top ended up being a mess)
  • Whisk in lemon juice and zest.
  • Finally whisk in the butter.
  • Microwave on 50% power for one minute. Stir. (I did this twice because I was paranoid about the eggs curdling)
  • Continue microwaving at 100% power in one minute intervals, stirring after each interval until the mixture is thick enough to coat the back of a spoon. The curd will thicken as it cools. (It only took me three times for it to be done).
  • Strain curd through a fine-mesh sieve to remove zest.
  • Pour curd into sterile jars and store for up to three weeks in the refrigerator.


  • This pic is before heating.  It looked foamy from the whisked sugar and the floating bits are the zest.

    This is after the straining.

    The total made was 3 1/2 pints and a generous amount left to sample.

    I will definitely be reusing this recipe.

    Tuesday, October 15, 2013

    Carrot Soup with Orange and Ginger

    I'm posting this because the girls' babysitter liked it and asked how it was made.  I've been wanting to eat soup lately and I couldn't find my Taste of Home soup magazine that I bought a few years ago, so I dropped by Half Price Books and bought 'Williams-Sonoma Soup' which surprisingly (at least to me) was the only cookbook dedicated to soup that they had.  I let the nerdlet choose the soup and not as surprising since carrots are one of her very favorite foods, she chose the carrot soup.

    Carrot Soup with Orange and Ginger

    3 T olive oil
    2 leeks, including tender green parts, thinly sliced (mine were very large)
    1 lb carrots, peeled and thinly sliced (I used 1 1/4 lb)
    1/2 lb red potato, peeled and thinly sliced (I used 3/4 pound various fingerling potatoes and didn't bother to peel them)
    5 cups vegetable or chicken broth (I used chicken)
    1/2 cup fresh squeezed orange juice
    2 t orange zest
    salt and freshly ground white pepper (I used black pepper)
    garnish with thin orange slices and fresh mint sprigs (I didn't bother)

    Warm the oil in a large saucepan over medium heat.  Sauté leeks until slightly softened.  Add carrots, potato, & ginger until just softened (~5 min.).

    Add the stock, cover partially, and simmer 'til the veggies are completely soft ~20 min.  Remove from heat.

    In blender, purée the soup in batched, leaving some texture and return to pan.  Return soup to medium heat, add orange juice and zest.  Season to taste with salt and pepper.

    Makes 4-6 servings (according to them).


    It really tastes like carrot with a little more tangy-ness and bite.  I was worried it would be sweet, but it was equal to or less sweet than a fresh carrot.  I will likely make it again at some point in the future, even if as I suspect, the nerdlet and I are the only ones that end up eating it.

    Saturday, August 31, 2013

    Gluten-Free Pizza Crust

    One of the things prevalent in both the Down syndrome community and the Autism community is the presence of people on gluten-free diets.  In the Ds community, a lot of our kids are gluten intolerant.  The bear cub is not one of these fortunately since she seems to be drawn to every wheat product in sight.  In the Autism community there are a few that are gluten intolerant, but the greater reason a lot of kids are on the diet is because it often affects behavior.  In this case I'm not sure that I'm fortunate that the nerdlet's symptoms aren't affected by diet because I would love some control of her issues.  I have, however, been trying to eliminate a large amount of the gluten in all our diets simply for the health benefits, so I have been checking out a number of books on the subject from the library, and just recently I have started checking out cookbooks (and possibly I might have bought a few).

    I finally broke down and started buying some of the ingredients because it seems that all the recipes require a ton.  I started with the cookbook "the diary-free & gluten-free kitchen", and yes, the title is in all lower case which has sort of been driving me nuts since I've had it.  For a couple of years while we lived in Panama, we lived next door to a family that had pizza every Friday and I always thought that was very cool and lately I've been thinking that I'd like to implement that tradition in our family so I figured that was a really good way to try out gluten-free recipes.  If anyone has their own gluten-free suggestions for cookbooks, recipes, flour mixtures, or binders, I'd love to hear/read them.

    First, the gluten-free flour mix from the cookbook:
         1 1/4 cups brown or white rice flour
         3/4 cup potato starch
         1/2 cup tapioca flour
         1/2 cup sorghum flour
    Combine and mix with whisk until thoroughly combined.  Keep in airtight container in the fridge for up to 4 months.

    Making this was interesting.  First potato starch and potato flour are two different things and not only do Whole foods employees all the way up the chain not know this, apparently even some manufacturers of the products do not know this and you will find one company label their box with both names.

    Next, I decided to be cheap and ground both the brown rice flour and the tapioca flour in my Vitamix.  Grinding the flours isn't difficult.  The tapioca flour requires no instruction really.  I simply put the tapioca in the dry container and started at low variable speed and slowly went up until it was on high and left it there until a flour.  It didn't even take that long, maybe a minute.  The brown rice flour took a little more work.  I did a cup at a time (this wasn't the only flour mix that I was making with brown rice) and maybe if I did a 1/2 cup like the tapioca, it would have worked slightly better.  I started a variable low and slowly raised it to 5 and left it there for about a minute.  Then I raised it slightly again and left it there for a few minutes.  When it got to the top variable speed, I left it until I started seeing that there was flour flying around and the bigger pieces were being left behind.  Then I shut off the machine, banged the container around, and started over as needed, until I had a nice consistent flour.  The vitamix was pretty warm when I was all done.

    Since this made 3 cups of flour and the crispy and traditional pizza crusts in the cookbook required close to that, I decided to try both recipes out.  I only took pictures of the crispy crust, but here they are.


    They were pretty well received. Darth Baby ate two pieces herself, half of the bear cub's and most of the bear cub's toppings, and bites of Q's. The nerdlet ate a whole piece herself and a bit of the crust from mine. Teh bear cub only ate half of her piece (the half with the crust). Q liked the thin crust better, but I liked the traditional crust better.  I will say that I normally love cold pizza for breakfast and I found the traditional crust leftovers tolerable but I couldn't eat the crispy crust version cold.

    Crispy Pizza Crust:
         1 1/2 gluten-free flour mix
         2 tsp gluten-free baking powder
         1/4 tsp xanthan gum
         1/4 tsp thyme
         1/4 tsp oregano
         1/4 tsp garlic powder
         1/4 tsp salt
         1 cup water
    Preheat oven to 425.  Line a metal pizza pan with parchment paper (I used silicon sheets).

    Mix dry ingredients with a whisk thoroughly.  Add water and stir to combine with rubber spatula.  Work quickly to spread batter less than 1/2 inch thick on parchment paper.  Pre-bake crust 15 minutes.  After adding toppings, bake another 8 minutes.  (My suggestion is to not underbake at either point).

    Traditional Pizza Crust:
         1/2 cup dairy milk alternative, warmed to 110 or 115 (I used pre-made almond milk but the book has a recipe)
         1/2 teaspoon date syrup (1 1/4 dates, 1 cup water, 1 tsp lemon juice blended in vitamix)
         1 package quick-rise yeast (I used 2 1/4 tsp of my bread machine yeast)
         1 1/2 cups gluten-free flour mix
         1 tsp xanthan gum
         1/2 tsp dried oregano
         1/4 tsp dried thyme
         1/4 tsp garlic powder
         1 Tbsp olive oil
         1 tsp apple cider vinegar
    Preheat oven to 425.  Line a metal pizza pan with parchment paper (I used silicon sheets).

    In small bowl, combine milk and date syrup and stir.  Add yeast and stir until dissolved.  Set aside until mixture doubled in volume, about 10 minutes. 

    Mix dry ingredients with a whisk thoroughly.

    Add oil and vinegar to milk mixture and stir.  Add this to flour mixture and stir to combine with rubber spatula.  Spoon dough onto prepared pan, smoothing out center and building edge slightly.  Cover with damp ktich towel and place in warm area to rise for ~20 minutes.  Pre-bake for 15 minutes.  After adding toppings, bake another 8 minutes.  (Again I would suggest not underbaking at either point).

    Thursday, August 29, 2013

    Jalapeño Cheese Pretzels

    My mom made pepperoni pizza pretzels using the recipe on Ciao Italia a few weeks ago.  I told her they were fine, but that I think I would appreciate having jalapeño cheese ones more.  She came down this week to see the girls off to school since they started this past Monday - the bear cub for another year of preschool and the nerdlet for kindergarten, and since she was saying she was going to leave yesterday, I talked her into staying another night and put out all the ingredients on the counter last night.  This morning while I walked the nerdlet to her bus stop, my mom started to put them together.


    Didn't they come out beautifully?  They are tasty, too.

    Here is the modified recipe:

    1 1/2 cups warm (110°F) water
    1 tablespoon honey1 package Fleischmanns pizza crust yeast2 tablespoons unsalted butter, melted2 tablespoons extra virgin olive oil4 to 4 1/4 cups unbleached all purpose flour1 1/2 teaspoons fine sea salt 2 4oz containers of pickled jalapeños
    8 oz grated cheddar
    8 cups water1/2 cup baking soda

    In a large bowl combine the water, yeast, honey, butter, and olive oil. Add 4 cups of the flour a cup at a time, the salt, and mix with the dough hook until the mixture is well combined and moves around the blade and begins to form a ball. Transfer the dough to a work surface and knead it a couple of times.

    Preheat the oven to 450°F.  Line two baking sheets with parchment paper and set aside.

    Divide the dough into 12 equal pieces (we did 16).  Roll each piece of dough under the palms of your hands into a 24-inch rope. Make a U-shape with the rope, holding the 2 ends of the rope, cross them over each other twice and press them into the center of the bottom of the U in order to form the shape of a pretzel. Place on the parchment-lined pans, spacing them about an inch apart.

    Bring the water and the baking soda to a rolling boil in a soup pot.  Use a wide face flat spatula or skimmer and boil the pretzels a few at a time until they float in the water. Drain them well and place them on the parchment lined pans, at least 2 inches apart. 

    You can brush the pretzels with the egg wash and sprinkle them with coarse salt and cheese, but we skipped this step.

    Bake until they are deep golden brown, about 15 minutes. Cool on racks. Best eaten warm.


    Monday, July 1, 2013

    Sway in Austin

    I'm visiting my mom and sister S in Austin. S and I left the girls with my mom and had our very first sister date.  We went to Sway, a modern Thai restaurant.

    It's a beautiful restaurant with lost of ambiance.  We planned on ordering all the appetizers, but even being capable of great feats of gluttony, we only managed to split four and that was too much.  We had the Prawn Miange (very spicy and weird texture, but very good), the Po-Pea Jay (also good, but other than the tomato vinegar pretty much what you could get anywhere else), the chicken wings (good, needs the lime served with it squeezed over it for that added punch), and the Satay (definitely taste the red chili peanut sauce they serve on the dish with it).

    If you like Thai food I highly recommend it.  If you don't like Thai food, you should still go for dessert.  Order the banana split.  It seriously was the best banana split I have ever eaten in my life.  They make the ice cream, the maraschino cherries, brownie bits, and everything else there.  I will be returning to try one or more of their other dishes and I will definitely leave room for the banana split.

    Wednesday, June 26, 2013

    The Great Peanut Butter Cookie Experiment

    Once a week, I get my niece, the Drama Princess.  Normally, we go to the park, then have lunch, and finish with a craft.  Today, the girls talked me into doing a baking experiment instead of the craft I had planned.  We decided to see what would make the best peanut butter cookies.

    We made four small batches of cookies consisting of 1/2 cup single ingredient peanut butter, 1/2 dark brown sugar, and 1/2 egg.  The nerdlet's was the only one that varied here and that was because in her vigorous stirring she pushed some of the brown sugar out of her batch.  I don't think it was really enough to make a difference here.

    The girls were then allowed to choose what to add to their batch.  

    The drama princess chose 1/3 cup cauliflower, which I steamed and put through the food processor.  They came out dark and gooey and spread the most.  They were the only ones to stick to the foil.  They took much longer than the other cookies to cook.

    The nerdlet chose 1/3 cup chocolate chips.  These retained their shape and original color the most.  They required the least cooking and seemed to hold their shape the best.

    Darth Baby reached for the extracts, which I interpreted to mean 1 tsp of vanilla extract.  They spread very little and while they were the darkest batter, they lightened to close to the same color as those without.  Sorry about the picture.  I didn't bother to even look at the pictures until I let them dig into the cookies.

    I chose for the bear cub and she went with 1/3 cup flour, a pinch of salt, and two pinches of baking soda.  They spread and rose, lightened quite a bit from the batter, and were very crumbly.

    The drama princess was sure that she would like the flour batch the most, but it turned out that she liked the chocolate chip version the most.  My three girls actually liked the cauliflower version the most, which came out very gooey, but definitely retained the most peanut butter flavor.  The bear cub's version with the flour, salt, and baking soda was the least peanut buttery and the least popular, but definitely came out the most like a typical cookie.  


    All four of the girls seemed to really enjoy this experiment and it was a great way to talk about experimental controls and test results.  

    Saturday, June 15, 2013

    Carrot Cupcakes

    The nerdlet loves carrot cake.  She loves it so much that she asked for it for the birthday cake for her 3rd and 4th birthday.  She also loves carrots so I hardly ever have enough carrots to make carrot cake even if I buy enough because she is demanding to eat them by the time we get home.  This week right after buying a big bag of carrots for her to eat, Greenling delivered me a huge amount in my local box, so I decided to make carrot cupcakes for her.

    This is the bear cub after the first taste when I handed her the bowl with the whole one in it.

     
    I took this picture and put my camera back and before I got back, the bear cub decided that her first one wasn't enough and had one of each of these in each hand and was devouring them as fast as she could.  In fact, I didn't bother to frost them at all because all three of my girls and Q, who normally will not even taste a piece of carrot cake, were happily enjoying them unfrosted.  That is pretty rare.  While I might get the seal of approval from two of my three girls on any particular thing, it isn't often that I get all three girls and Q to enjoy the same thing.  Even any particular flavor of ice cream won't get all four to agree. 

    Here is the recipe I used:
    5 cups of grated carrots
    1 cup packed brown sugar
    1 cup golden raisins
    4 eggs
    1/2 coconut oil
    1 1/2 cups white sugar
    2 teaspoons vanilla extract
    1 small can crushed pineapple
    3 cups all-purpose flour
    1 1/2 teaspoons baking soda
    1/2 teaspoon baking powder
    2 heaping teaspoons ground cinnamon
    1/2 teaspoon allspice
    1 teaspoon salt
    1 cup chopped walnuts
    1/2 cup coconut

    1. Combine grated carrots and brown sugar.  Set aside for about an hour.  Then stir in raisins.
    2. Preheat oven to 350 degrees F.  Grease and flour 3 round 9" cake pans (or whatever pans you are using - this time I used cupcake tins and mini loaf pans).
    3. Combine flour, baking soda, baking powder, cinnamon, allspice, and salt and set aside.
    4. In large bowl, beat eggs until light.  Slowly beat in the white sugar, oil, and vanilla.  Stir in pineapple.  Stir in flour mixture until absorbed (stir as little as necessary).  Finally stir in carrot mixture, coconut, and walnuts.  Pour evenly into pans.
    5. Bake 35-40 minutes, until toothpick comes out clean.  Cool 10 minutes in pan before removing to cool completely.  Frost with cream cheese frosting (my cupcakes took about 25 minutes and the mini loafs 30-35 minutes).

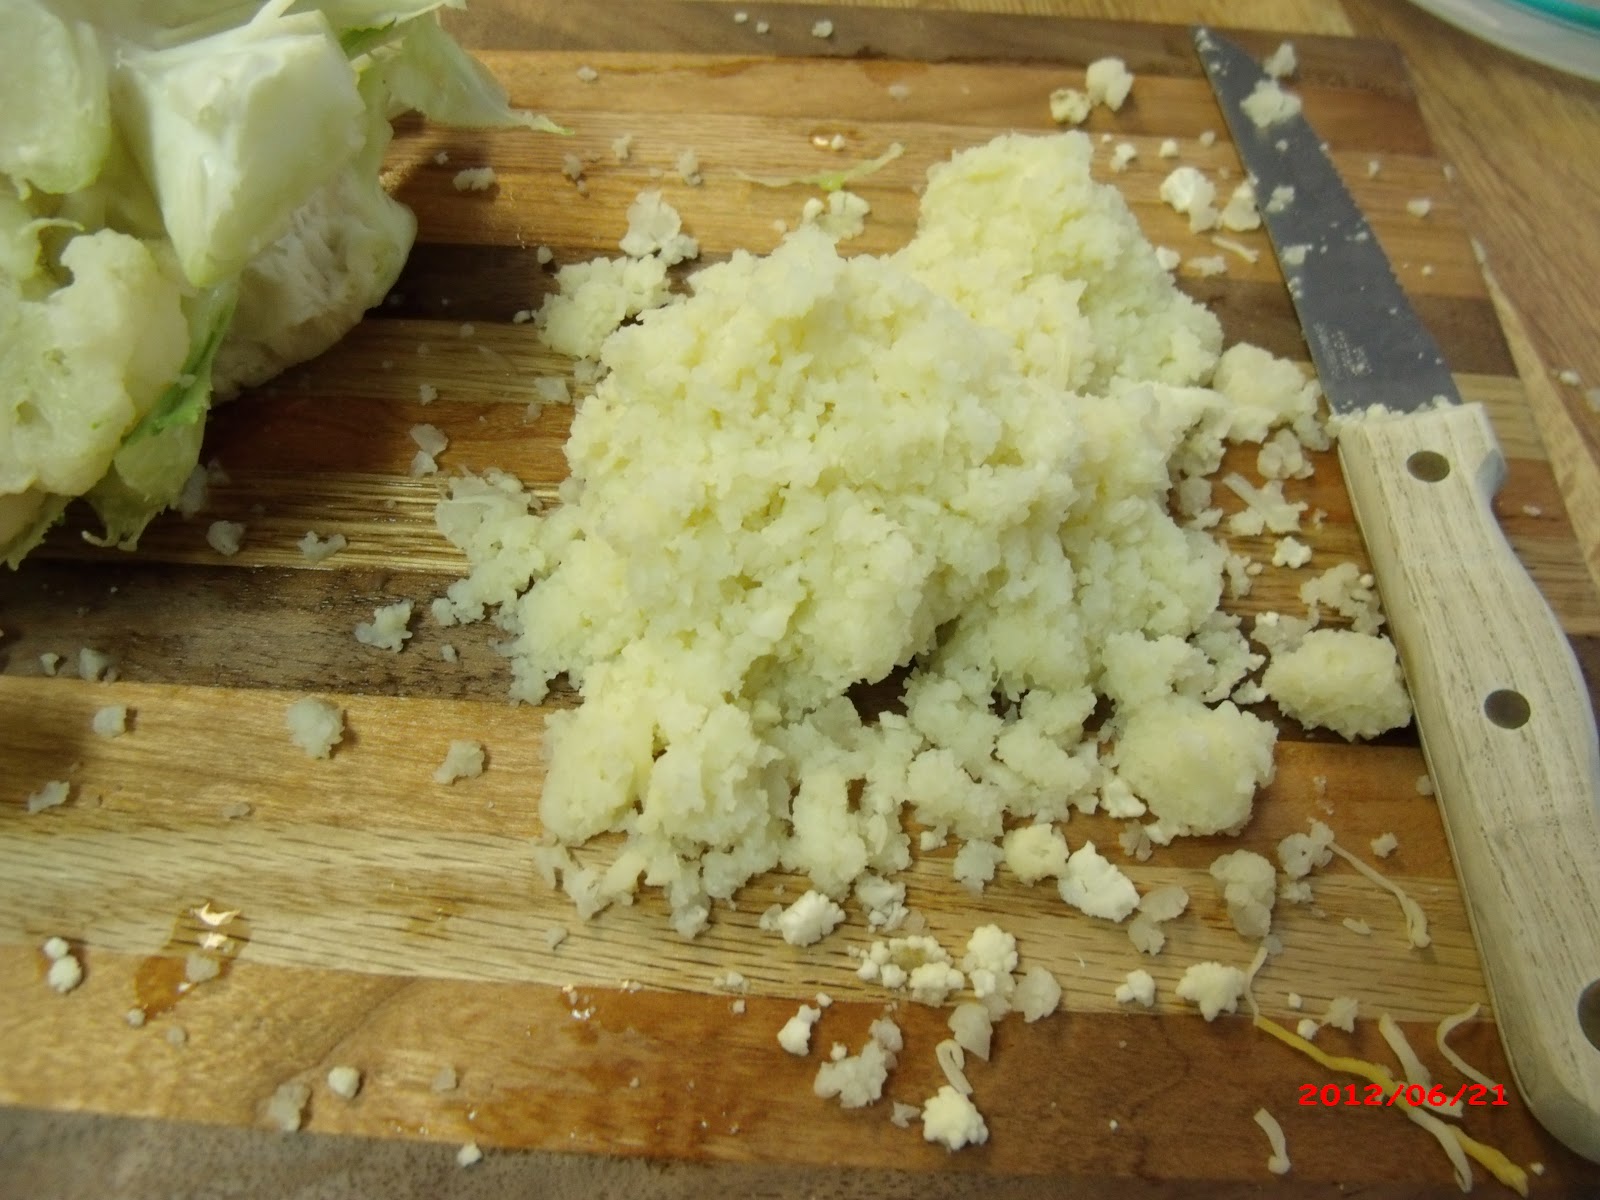
    I've used this recipe a couple of times and using store bought organic carrots, I've never had an issue.  This time using the Greenling carrots,which are so much fresher, I had a lot of liquid accumulate in the grated carrot/brown sugar mixture.
     This is after 40 minutes of sitting.  I decided to add the raisins early to see how much liquid would be absorbed by the raisins.


     There was still a lot of liquid so I decided to drain it off.  I ended up draining about 1/2 cup of liquid off.  This is the dampness that I ended up with and there was still liquid in it, so I also drained about 1 Tbsp off the juice off the pineapple, too.

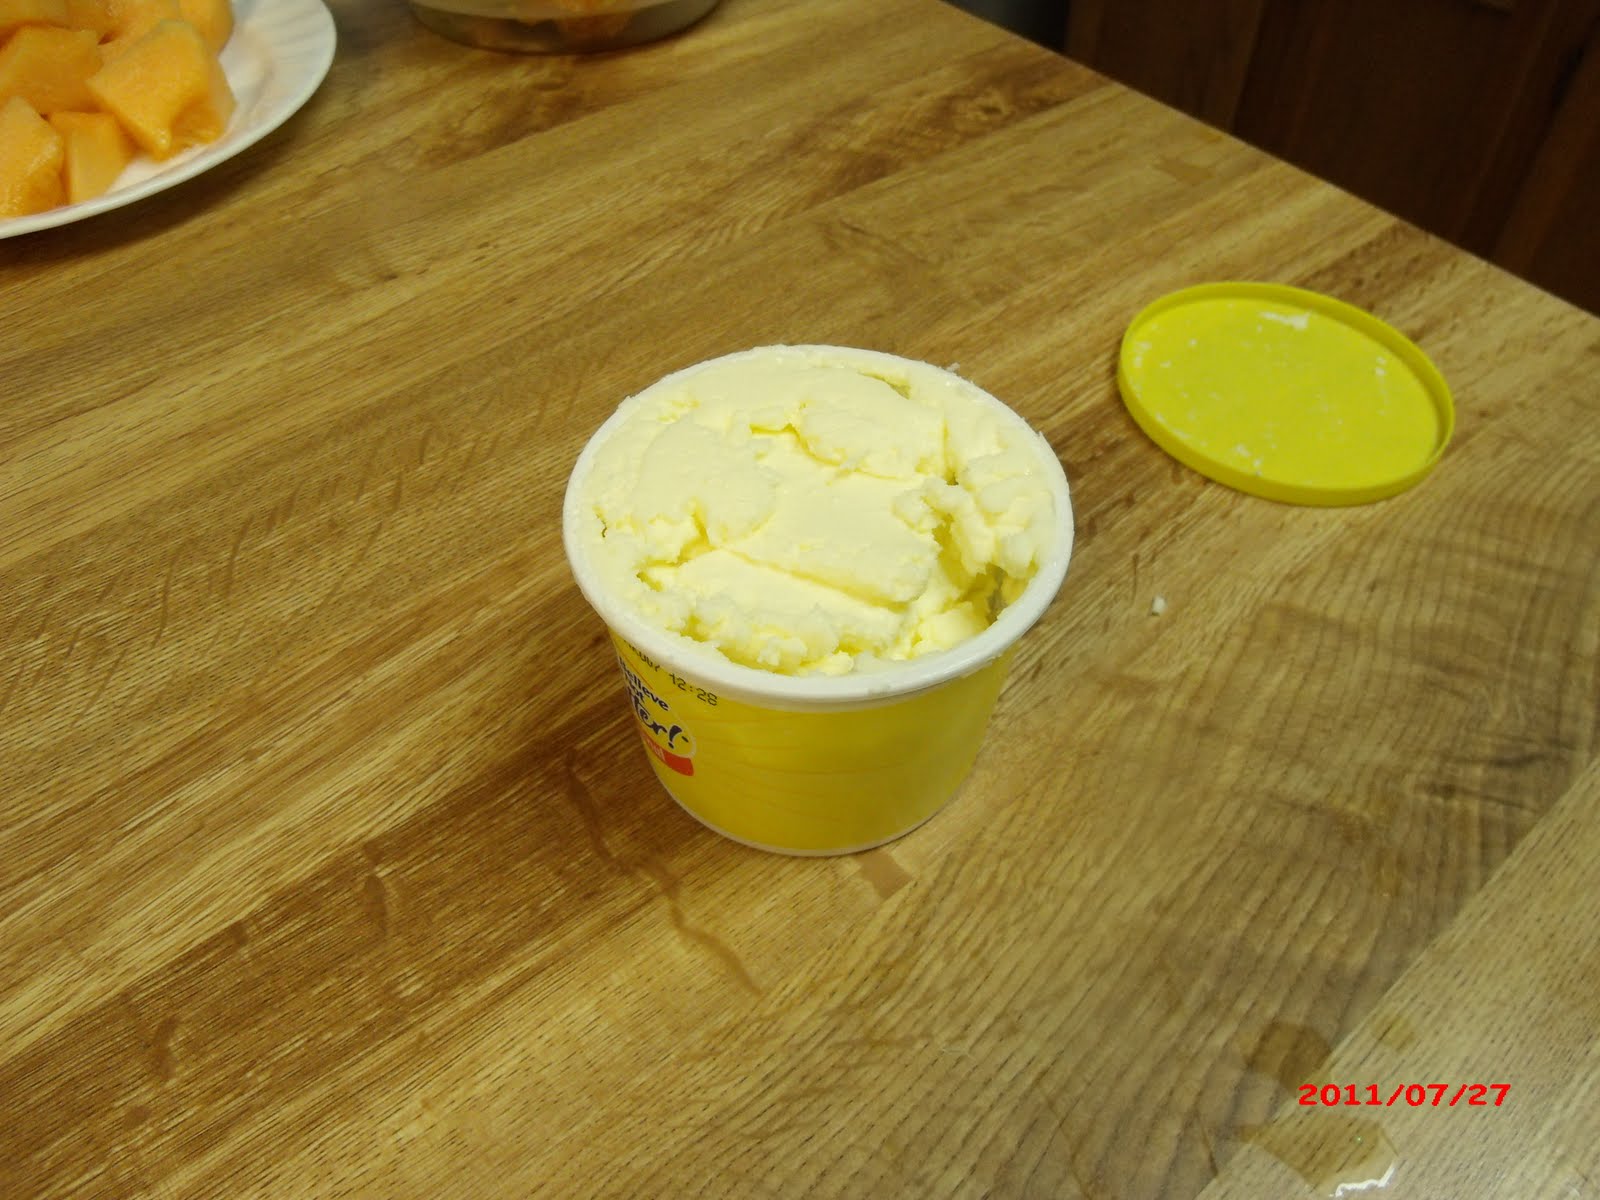
    Just for reference, I thought I'd show what the final batter looks like moisture-wise.

    While making these I was thinking that since this was really quite a bit more work than a regular cupcake that I wouldn't make them again if they weren't a big hit, but it looks like the muffins are more popular than the cake has been.

    Saturday, June 8, 2013

    Corn Cakes

    In theory, Q and I have two date nights a week.  One for just the two of us and one for us with one of the girls.  Our personal date nights most often consist of us going shopping for groceries or getting other things done that we haven't managed over the past week.  However, sometimes we even get dinner and one of the places we like to go is to the Cheesecake Factory.  Q usually gets the same thing, and I alternate between the Chicken Madeira (at least until I can successfully reproduce it - a work in progress and getting closer all the time) and trying new things on the menu.  Something I got recently was the Stuffed Chicken Tortillas, which comes with sides of black beans and a corn cake.  I decided that I needed to find a corn cake recipe, but I didn't really do anything about it.  Since the bear cub has had her tonsil and adenoidectomy, she has been really upset that she couldn't have any corn tortilla chips and so I thought making this might address her craving and still meet the 'only soft foods' requirement.  It also didn't hurt that the Greenling local boxes have fresh corn in them right now.

    A Google search resulted in a knock off recipe here.  I changed the frozen corn for fresh (cooked in the pressure cooker) and used 2 cups of corn instead of 1 1/2 cups, but otherwise, I pretty much stuck to the recipe.  It resulted in a version that looked just like what I got at Cheesecake Factory, but was both a little grainy, a little sweet, and a little greasy.  The bear cub and Darth Baby both really liked it.

    Since I had put 6 ears of corn (and a couple of smaller branch offs) in the pressure cooker, I had about four cups of corn, and I decided to see what this recipe would taste like if I took out the dairy.  I like to take the dairy out of my girls diet whenever I can, but I also don't have a lot of fake versions of dairy or other non-vegetarian items around, so instead of a fake butter, I used olive oil and instead of milk, I used a coconut/almond milk mixture.  I also used lessened the amounts.  My version doesn't look as appetizing, but even Q admitted that the texture and the flavor was better, though if I make it again, I don't think I'll use olive oil, but another oil choice because you can smell the olive oil in the finished product.

    Here is the recipe I used for the second version:
      Ingredients:
    1/3 oil or butter
    1/3 masa harina
    1/3 milk of choice
    1/4 cup corn meal
    1/4 cup sugar
    1/2 tsp baking powder
    1/4 tsp salt
    2 cups corn kernels (I just throw the ears in the pressure cooker with ~1/2 cup water and steam for 6-7 min.)

    Preheat oven to 350.  Mix oil, masa harina, and milk well in a medium bowl.  Add corn meal, sugar, and baking powder and beat until smooth.

    Drain the corn and chop in food processor.  Don't over process.  This is what mine looked like when I was done.

    Add the corn to the batter and mix some more.  Spread into a container, cover with foil, and add to a water bath.  I put the containers you see above and some ramekins into a 9 x 13 pan and filled the outer pan with hot water about 1 1/2 inches of water.  Place into the oven for 60 minutes.  This isn't too long even for the small ramekins I used.

    Remove from oven and uncover.  Let sit for 15 minutes before serving.  The Cheesecake factory then shapes into patties and pan fries them before serving these, but I didn't bother.  I'm thinking that next time I try these I might mix the batter in the food processor and add a chipotle in adobo sauce to the mix.

    The nerdlet didn't eat more than 3 tablespoons, but her sisters have been more than willing to edge over to her plate and help finish her serving off.

    Saturday, May 25, 2013

    Strawberry Bleu Cheese Salad

    I'm having one of my 3 favorite salads for lunch.  This is the one I have least often and I'm not really sure why.  It's probably because I don't eat bleu cheese in anything else so I rarely have it on hand.  


    Here is the recipe that I usually use, but today I only used spinach for the greens and I used toasted walnuts instead of pecans:

    2 cups of Baby spring mix (I use anything without arugula)
    1/4 cup sliced strawberries
    10 toasted pecan halves or smaller
    3 ounces of chicken (I just buy a deli rotisserie chicken)
    4 cherry tomatoes (the ones in the picture are from our garden)
    sprinkle of crumbled bleu cheese

    Adjust amounts to taste. Throw them all together. Serve with raspberry vinagrette or a balsamic dressing. I've been using Newman's Own Light Raspberry Walnut. I had a version at a restaurant with the chicken being a chicken breast marinated in a sweet balsamic dressing and it also had french fried onions and grated carrot.  To toast the nuts, I just throw a cup or so of the nuts into a frying pan that was preheated for a couple of minutes, stir and leave for a couple of more, then remove from heat.  

    Thursday, June 21, 2012

    Cauliflower Pizza Crust

    One of my fellow mommies of a child with Ds posted a recipe for a pizza crust made of cauliflower.  My niece is super picky and loves pizza so I thought that maybe I would use this to get her to eat something without a hassle during her weekly visit.  I also was super curious about how you could possibly make something like cauliflower into a pizza crust.

    First, I took a fresh head of cauliflower and shoved as much of it as I could into my microwave vegetable steamer for 5 minutes on full power.  This resulted in fully cooked cauliflower that wasn't mushy at all.  I put that in the food processor and pulsed it until it was uniform and small.  I used 2 cups worth (double the recipe).

     Then I added 2 cups of shredded cheese and 2 eggs and mixed them together in the food processor.  I only had a colby jack mix in the house so that is what I went with.

    I spread it in my 14 inch deep dish pan and sprinkled italian seasoning and garlic powder on it and baked it for 15 minutes in my oven that was preheated to 450 degrees.

    This is what is looked like when it came out.  It actually looks pretty solid.

    I spread pizza sauce on the crust and sprinkled cheese and toppings.  Because my niece is super picky, this is what I went with, but when I make this in the future, it will have a lot more toppings.
     I put it back in the oven at 450 degrees until the cheese was melted and bubbly.  I might try and leave it a little longer next time.

    The verdict?  It smells great and all four of the little girls here loved it.  The drama princess, my niece, told me that I could make it for her every week when she visits.  Darth Baby ate two servings.  I think it was a little weird for me but edible.  The crust wasn't a real crust and was more like squished together couscous in texture and taste, but it held together on a fork even if you couldn't lift it and eat it like a pizza.  Considering the difference in healthiness I will definitely be making it for them again (even if not the once a week requested.

    A picture of the happy four at the zoo this morning.

    Thursday, December 1, 2011

    Thursday Fun

    I have the privilege of picking up my niece, the drama princess, on Thursdays after school. Most Thursdays I try to have something fun to do. We've made cupcakes and muffins and brownies and done various crafts, but I've decided to switch to cookies at least until Christmas. Today, we made snowman cookies.

    My niece isn't encouraged to do a lot of free form creative things often and was trying to impose rules on the nerlet's cookie making. I explained that they both could make cookies however they wanted with the number of eyes or mouth pieces that they wanted to without anyone telling them how it should be done and after the drama princess thought about it, she decided to go wild. Here are the final cookies.

    I think they did a great job, don't you. These were actually the last ones done by my niece and I'm so proud of her for going outside of her comfort zone.

    Friday, September 30, 2011

    Second Zucchini Recipe - Chocolate Zucchini Cake Brownies

    I'm had a hard time with what to call this recipe. It's based on chocolate zucchini muffins, which would be better called cupcakes. I think if you frosted it and called it a cake, no one would really question it. There was one snafu while I was making it in that the nerdlet poured an unknown amount of oil into the batter while I was taking the bear cub to use the bathroom so I had to guess how much more to add when I got back, but they came out tasty so I figure there must be some fudge factor in regards to how much oil to use.


    2 C sugar
    3 eggs
    1 C vegetable oil
    1 Tablespoon vanilla
    1/2 C sour cream
    2 C grated zucchini (about 2 medium peeled)
    2-1/2 C flour
    1/2 C unsweetened dark cocoa powder
    1 teaspoon salt
    1/2 teaspoon baking soda
    1 teaspoon baking powder
    1/4 teaspoon freshly ground nutmeg
    1/2 teaspoon cinnamon
    1/2 C chocolate chips

    Preheat oven to 375.

    In a medium-sized bowl, mix zucchini, sugar, eggs, oil, vanilla and sour cream. MIx dry ingredients in a large bowl. Stir in wet mixture and blend until batter is smooth.

    Pour batter into 9 inch square pan and sprinkle chocolate chips on top. Bake 55-60 minutes or until a toothpick comes out clean.

    Thursday, September 29, 2011

    The First of the Zucchini Recipes

    My local box from Greenling this week contained 12 yellow squash, which I'm pretending are zucchini and as some of them looked like they weren't going to last very long, I'm trying to use them up in a hurry. Yesterday, I used 4 of them up in zucchini bran muffins, chocolate zucchini bread, and taco shells.

    We had the taco shells for dinner and Q and the nerdlet loved them so they will definitely be a repeat item. I first saw them on pinterest and dismissed them because the recipe didn't really read very Mexican, but I reconsidered them when I saw that a number of people were making and enjoying them.

    My recipe is a smidge different as I chop up an onion pretty much any time I ground beef and I was trying to use up my squash.

    Ingredients:
    1lb ground beef
    1 package taco seasoning
    1 medium onion
    1 cup chopped zucchini
    1 clove garlic
    1 4 once package cream cheese (next time, I'll use asadero)
    18 large pasta shells
    1 cup salsa
    1 cup taco sauce
    1 cup cheddar cheese (shredded)
    1 cup Monterey jack cheese (shredded)
    1 ½ cups tortilla chips (crushed)

    1. Preheat oven to 350.
    2. In a fry pan cook chopped onion until almost clear, add ground beef, zucchini, garlic, and taco seasoning and cook until the ground beef is thoroughly cooked. Add cream cheese (next time I will use shredded asadero), cover and simmer until cheese is melted. Blend well. I did not allow the mixture to cool and put it into the shells hot as soon as the shells were done. While burger is cooking cook the pasta shells and drain. Rinse with cold water and toss in a little olive oil.
    3. Pour salsa in the bottom of a 9 x 13 inch baking dish.
    4. Stuff each shell with the meat mixture. Place the stuffed shells in the baking dish and cover the tops of the shells with taco sauce. Sprinkle top with chips (which I didn't use) and the two cheeses.
    5. Cover and bake in the oven at 350 degrees for 15-20 minutes until cheese is melted. If you allow the meat mixture to cool, you will have to cook the shells much longer to reheat the meat.

    Serve with sour cream, black olives, lettuce, tomatoes, guacamole, or anything else that you like that goes well with tacos.

    Saturday, August 27, 2011

    English Muffin Breakfast Sandwiches and Laundry Questions

    So I joined pinterest mostly to see other people's sewing and quilting links, but I've been getting caught on all the recipe links.

    One of the links that I saw on a bunch of friend's boards is for breakfast sandwiches. It's simple enough to do and you probably don't need a recipe.

    I used cheddar and colby jack for the cheese, whole wheat muffins, and eggs. I also added turkey sausage to half of them.

    Here are the finished sandwiches. I will be freezing these for Q to grab in the morning for work.

    I've gotten a few questions about the laundry soap:
    Can I use it in a high efficiency washer?
    Yes, I think so. I googled a number of things to determine the difference between HE detergent and regular detergent and also the differences in the machines themselves and how they handle the detergent. I also found a couple of quotes from the manuals of HE washers and letters from the manufacturers of the machines in response to this question. The general consensus is that HE detergent does not create as many suds as regular detergent, and the laundry detergent I made makes very few suds. Chemically they should act the same for cleaning. The recommendation from others using this same detergent in their HE machines is to use only 1/4 cup of detergent for each load. Also, I've read the recommendation to occasionally run a hot wash in your HE washer with just vinegar to clean the system regardless of whether you use this recipe or a store-bought detergent and that seems like a really good idea.

    Aren't you worried about it causing rashes on your babies?
    Well, I really didn't consider this at all. I didn't consider it when I used regular detergent when I first had the nerdlet and everyone was recommending to make sure I got a really gentle soap either, but this soap is going to be more gentle than store bought detergents on both your baby and the environment. However, the diapers have all been through the wash using the new detergents and Darth Baby actually seems to have less pinkness than before even when I use the plastic diaper covers that usually cause it.

    How long did it take to make?
    It took me about an hour, but that is because at every step I had to go searching for something. Where is that bucket? What in the world did I do with my immersion blender? How am I going to stir the five gallon bucket? Nerdlet, can you go get the funnel from your toys in the bathtub? Anyway, you get the idea.

    Well, that is way better than making lye soap.
    I think my MIL thinks I'm too nutty crunchy. She thinks I'm a bit weird for breastfeeding and making my own baby food. I get the impression that she isn't entirely comfortable with my using cloth diapers (and when she has had them they have been in disposables for the most part - or at least they come home in disposables). When she heard I was making my own laundry soap, she obviously was picturing the old way her mother used to make soap. Just for the record, I will never be doing that.

    I was actually surprised at how much interest there has been in the laundry soap, but the way I figure it is that if it doesn't work for you, you have wasted $7.00 and an hour of your time. If it does work, then you have a product that is much cheaper (even accounting for your time) and that is better for the environment.

    Monday, August 8, 2011

    Liam again

    I spent the weekend at the National Down Syndrome Congress Conference. It was wonderful seeing so many people with a direct connection to someone with Down syndrome. If you don't have someone with Down syndrome in your intimate circle of family and friends, then you are definitely missing something. We like to say that our kids have something extra, but we could also say the rest of us have less, less hugs, less love, less acceptance, less peace, less understanding of what is important.

    Amy understands this so much that she is adopting her fourth son with Down syndrome, Liam. She still needs $8K to be able to rescue him and bring him home. My younger sister is a Tastefully Simple representative and she is donating 100% of the profits of an online catalog party to Liam's adoption. Just go to the Tastefully Simple website and order delicious gourmet food products to help with Liam's adoption. Just list me 'Kimberly Hughes' as the host and my sister will make sure the profits are directed to Liam's adoption. This is the last week of the party will end on August 15th.


    I saw a package of beer bread mix at my local grocery story and I couldn't help but have a bake off.


    Both asked for 12 oz of beer and I used Corona light.

    Although the package of Firenza makes an almost insignificantly smaller loaf and has slightly less dry ingredients, somehow it was a much drier loaf.


    The Tastefully Simple bread mix was about the same price after shipping (cheaper without shipping), but it was much, much tastier. So if you like beer bread, buy it now through the catalog party. The spinach and artichoke dip and the Fiesta dip have been a hit at the two parties I have served them at. I also am very fond of the Almond pound cake.

    As always you can skip the party food and donate directly to his adoption here, and donations are tax deductible.

    Wednesday, July 27, 2011

    Butter

    I made butter!

    I have a Vitamix blender that is about 20 years old that I love and has gotten a LOT of use. It has been through at least five moves and been dropped many times. The last time I dropped it or maybe the time before, it lost it's ability to have variable speed and is stuck on max, but because these blenders are really expensive, we were continuing to use it as I mostly make smoothies and it was still good for that. I was using almost every day and sometimes more often. Costco had them on sale this past weekend and Q agreed that considering how often I used it and how useful having variable speeds are that we should replace it. I've had it since Saturday and have already used it 6 times. This morning I used it to make butter, marvelous, fabulous unsalted butter. The nerdlet was trying to scoop it out of the blender to eat it straight.

    I started with 2 cups of whipping cream.

    Then blended it on and off at half speed for about 5 minutes.

    Then I poured out the liquid.

    And I just had to store it in an old 'I Can't Believe It's Butter' container.

    I can't believe how easy it was and how good it came out. If you have a Vitamix, I highly recommend you try it at least once. The whipping cream cost about a dollar and a half and you can buy a pound of butter for $3, so you aren't really saving any money, but it's so cool to do.

    On another note, the Tastefully Simple party to help fund Amy's adoption of Liam is still going on. To order, go to Tastefully Simple and list me 'Kimberly Hughes' as the host and 100% of the profits are directed to Liam's adoption. This party is going to run until August 15th but Amy, Liam, and I would all love it if you ordered now. At Darth Baby's baptism, I served the artichoke dip, the taco cheese ball, and the chocolate pound cake. The dips were finished within minutes of coming out (and this was a small gathering). I ended up scraping the bowls before they went into the sink. I really recommend the artichoke dip. Even my husband really liked it and he doesn't care much for artichoke.

    I don't know if the pound cake wasn't devoured because they were full on the dip or if it just wasn't as appealing, but it came out really wonderfully in the Wilton giant cupcake pan. If you are having a hard time getting a box mix to work in your cupcake pan, this is the mix to use. I measured out 2 cups of the batter to ensure that I put equal amounts in both the top and the bottom and it came out perfect, not over or undercooked anywhere in the cake.

    As always you can skip the party food and donate directly to his adoption here, and donations are tax deductible. Thanks so much!

    Tuesday, July 12, 2011

    Greenling Again

    I know that I said that I wasn't going to order a local box from Greenling again, but I lied. This is actually my fourth one. I just love the fresh fruits and vegetables delivered to my door, and my sister stated it perfectly when she said it is like food tasted when we were little. It tastes like it is supposed to taste. My sister and I used to get in trouble because we would eat the stuff out of the garden and farm at my grandparents, and these fruits and vegetables taste like that did. Also it is getting me to eat stuff that I wouldn't normally buy and I'm reveling in it. If you live in the area covered by Greenling, I can't recommend it enough.

    The box as I opened it.

    Purslane. I will be making a green smoothie out of this after I taste it. I've been meaning to try it but unwilling to butcher my beautiful purslane out front.

    Blueberries. The nerdlet grabbed these right away so that I could wash them and she is snacking on them right now. I've learned that when I open the box, she is expecting to eat something out of it right away. I disappointed her last week.

    Tomatoes.

    Basil. I think it's spicy globe basil. When I opened the box, the smell of the fresh basil hit me and it was divine. I'll be using this with the tomatoes and picking up some fresh mozzarella, I think.

    New potatoes.

    Figs. My mom loves these. I'll definitely save some for her.

    Onions.

    Nectarines. I love nectarines. I could eat all four of these in one sitting.

    Yellow bell pepper. I'm thinking of picking up some chorizo and combining it with some of the onions and peppers and having breakfast burritos all week.

    Eggplants. I'm thinking some baba ghanouj, but that still leaves a lot of eggplant. I'll be researching recipes, I guess, unless anyone has any suggestions.

    I do have a coupon code for people trying it for the first time, KIMHUG241, but I think it isn't stackable with the one you get from their website and their coupon is better, but I'm posting it just in case anyone tries it.