
Thursday, February 27, 2014
Throwback Thursday
A picture of my older sister and me at ages 3 and 1. I loved these outfits. I'm thinking about duplicating them for my girls.

Wednesday, February 26, 2014
McCall's 6875 - Versions 3 and 4
It's been a while. I've been coughing to the point where I had a hard time accomplishing anything. I didn't have any other symptoms though so I have been ignoring it for much longer than the two weeks a virus should have cleared my system. This past week it was much worse so I finally dragged myself in and I got a slew of drugs and am not feeling much better.
I mentioned before that I had a number of these dresses cut out and ready to sew. The third version has actually been finished a while - probably since the day after I talked about it. I have pictures of both the nerdlet and Darth Monkey in it.


 It's much shorter on the nerdlet but it fits them both fairly well. Like versions 1 and 2, this one and version 4 are both straight size 4s.
Version 4 was a little harder. It used to be that no matter what dress I was planning to make a yard was plenty, so I have quite a few yard cuts that haven't been made into dresses. So version four has a different fabric for lining, some piecing on the front bodice and the skirt isn't cut as full as the pattern dictates.


I mentioned before that I had a number of these dresses cut out and ready to sew. The third version has actually been finished a while - probably since the day after I talked about it. I have pictures of both the nerdlet and Darth Monkey in it.
Version 4 was a little harder. It used to be that no matter what dress I was planning to make a yard was plenty, so I have quite a few yard cuts that haven't been made into dresses. So version four has a different fabric for lining, some piecing on the front bodice and the skirt isn't cut as full as the pattern dictates.
Both sides have this extra piece on the sides.
You can also see where I decided to just serge the bottom of the bodice lining and sew in on instead of turning it under and slip stitching it.
The front ribbon does lie on the body when the girls are wearing the dresses, but it always looks loose when not on the body.
And the back.
I have two others half done and one other started, but I'm not sure if I'll have time in the near future to finish them.
Monday, February 3, 2014
Making ties
While everyone else was apparently watching the superbowl, Q was entertaining the girls outside of the house so that I could get some sewing done.
I have about five dresses that are now cut out and at the beginning of assembly and I got to the ties. I absolutely hate turning ties and so do just about anything to avoid that. I thought I would show what I do so that I avoid it.
First I cut the straps as the pattern indicates.

Next I sew the very end up to the straight area.

Then I trim the corners.

I turn that area and bring out the points as best I can.

Then I iron while turning the seam allowances in (in this case 5/8")

Here is the strap ironed out. You get a glimpse of the bodices from the upcoming dresses.

Then I just topstitch the whole thing.
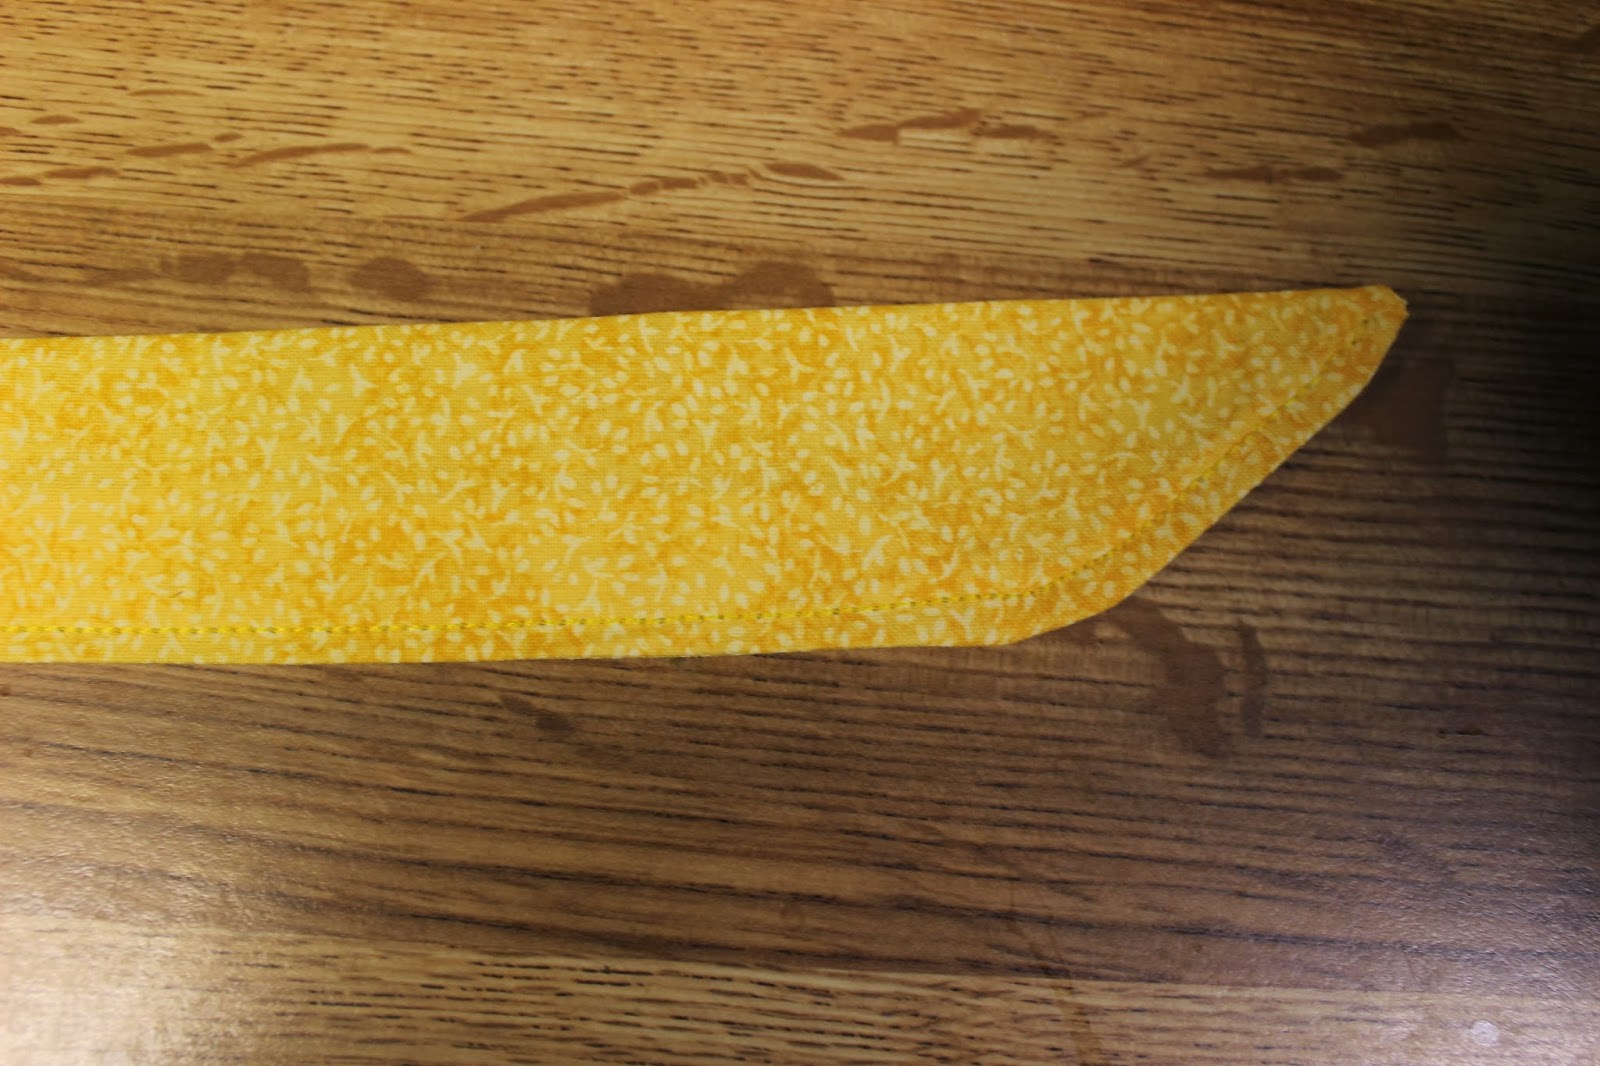
I also do this with double fold bias tape. I did not use bias tape here for two reasons: one - I didn't have the right colors, and two - the straps needed to be the exact width (or really close to it) as the band across the bodice). For the bias tape, I turn it inside out to do the end and sew the angle. Then I flip it back inside and continue as above. I'm not sure my method is really any less work, but it is less of a hassle to me and as I suffer some from arthritis, this is a lot easier on my fingers and hands.
I have about five dresses that are now cut out and at the beginning of assembly and I got to the ties. I absolutely hate turning ties and so do just about anything to avoid that. I thought I would show what I do so that I avoid it.
First I cut the straps as the pattern indicates.
Next I sew the very end up to the straight area.
Then I trim the corners.
I turn that area and bring out the points as best I can.
Then I iron while turning the seam allowances in (in this case 5/8")
Here is the strap ironed out. You get a glimpse of the bodices from the upcoming dresses.
Then I just topstitch the whole thing.
I also do this with double fold bias tape. I did not use bias tape here for two reasons: one - I didn't have the right colors, and two - the straps needed to be the exact width (or really close to it) as the band across the bodice). For the bias tape, I turn it inside out to do the end and sew the angle. Then I flip it back inside and continue as above. I'm not sure my method is really any less work, but it is less of a hassle to me and as I suffer some from arthritis, this is a lot easier on my fingers and hands.
Saturday, February 1, 2014
McCalls 6878
I'm going to be making a lot of yellow items in the near future. I finished McCalls 6878 last night. It's a brand new pattern and I couldn't find any reviews of it anywhere. Here is the picture that the company posted on the front of the package.
 I thought it was cute, if a little shorter than I like to have my girls wear and I was worried about the straps falling off as they really look like if this child moves they will fall off.
Turns out that I was way off on one and spot on on the other. I made the size 4 since that works so well on McCalls 6875. It was not too short. It is longer than the long dresses and I actually put in a 4 inch hem. I think it might be a good maxi for my 6-year-old if I were to just serge the bottom. It is, however, falling off of the shoulders much more than this picture shows. I suspect that they tacked the straps to make them curve less in the model and that they also put a much smaller sized dress on this model than she normally wears (possibly a size 2 on this size 5 child).
I couldn't tell when I finished it last night, but it looked very nice on the table.


It is huge. After trying it on Darth Monkey, I tried to take it off and she wouldn't let me because 'she is going to wear her yellow princess dress!' She also wouldn't model it for me, but here are the pics I did get.

 My plan is to tack triangles off the of the straps in both the front and back where it will barely sit on the shoulder but will maybe at least stay on them.
I may make this again, but if I do, I will draft straight shoulders and likely change the construction of the sleeves quite a bit.
Turns out that I was way off on one and spot on on the other. I made the size 4 since that works so well on McCalls 6875. It was not too short. It is longer than the long dresses and I actually put in a 4 inch hem. I think it might be a good maxi for my 6-year-old if I were to just serge the bottom. It is, however, falling off of the shoulders much more than this picture shows. I suspect that they tacked the straps to make them curve less in the model and that they also put a much smaller sized dress on this model than she normally wears (possibly a size 2 on this size 5 child).
I couldn't tell when I finished it last night, but it looked very nice on the table.
It is huge. After trying it on Darth Monkey, I tried to take it off and she wouldn't let me because 'she is going to wear her yellow princess dress!' She also wouldn't model it for me, but here are the pics I did get.
I may make this again, but if I do, I will draft straight shoulders and likely change the construction of the sleeves quite a bit.
Thursday, January 30, 2014
Lemon Curd
So I was browsing through lemon cupcake recipes and came across this recipe for microwaved lemon curd. I linked it on facebook and joked that if it worked I'll be gaining 10 pounds in the next week. It's a good thing it is going to be warmer this week so I can go to the gym and work off the coming calories because this was amazingly easy and good. I only have a few pictures because I didn't think to when I started.
Lemon Curd:
1/2 cup unsalted butter
1 1/4 cups granulated sugar
3 eggs
1 egg yolk
1 cup fresh lemon juice (about 6 juicy lemons)
lemon zest from 3 lemons (I highly recommend this article, if you haven't read it)
Melt butter in microwave, set aside to cool slightly.
Whisk together sugar and eggs in a medium-sized microwave-safe bowl. (I would use a large bowl so you have room to whisk - my stove top ended up being a mess)
Whisk in lemon juice and zest.
Finally whisk in the butter.
Microwave on 50% power for one minute. Stir. (I did this twice because I was paranoid about the eggs curdling)
Continue microwaving at 100% power in one minute intervals, stirring after each interval until the mixture is thick enough to coat the back of a spoon. The curd will thicken as it cools. (It only took me three times for it to be done).
Strain curd through a fine-mesh sieve to remove zest.
Pour curd into sterile jars and store for up to three weeks in the refrigerator.


I will definitely be reusing this recipe.
Lemon Curd:
1/2 cup unsalted butter
1 1/4 cups granulated sugar
3 eggs
1 egg yolk
1 cup fresh lemon juice (about 6 juicy lemons)
lemon zest from 3 lemons (I highly recommend this article, if you haven't read it)
This pic is before heating. It looked foamy from the whisked sugar and the floating bits are the zest.
This is after the straining.
The total made was 3 1/2 pints and a generous amount left to sample.
I will definitely be reusing this recipe.
Throw Back Thursday
I cut off quite a bit of the nerdlet's hair last night and it got me to thinking about her self-given haircut a little over two years ago.

Tuesday, January 28, 2014
More Little Sister Hats
After making the nerdlet her hat, it was clear that my other two also needed their own versions (and the drama princess has requested one for herself, too). I could only find yellow in the thick Redheart yarn and as I didn't want to go to more than two stores, I settled. It's a good thing that Darth Monkey has the least issues about what she wears.

The bear cubs is the same yarn as the nerdlets but in blues and purples instead of greens. It is also made smaller.

Afterward, I decided to make Hannah one, too. For Hannah's, I used an 'E' hook and sort of winged it. Here is Hannah as a 'rock star' as Darth Monkey calls her in the sunglasses.


The outfit and sunglasses are actually from Build-A-Bear. Someone gave me a gift certificate at the nerdlet's baby shower and I finally got around to spending it this week. The cashier was skeptical when she saw the date on it and I told her it hadn't been used, but the full credit was in there. I chose the brave dress because the bear cub loves Merida.
Here is a glimpse of her meeting Merida at Disney and you can see how happy she was about it. The outfit came with a wig, too, but the bear cub was not interested in keeping that on Hannah (though she did wear it herself for a while).

I may make one more of these hats for the drama princess, but it's kind of a wait and see since I didn't purchase any yarn for hers.
The bear cubs is the same yarn as the nerdlets but in blues and purples instead of greens. It is also made smaller.
Afterward, I decided to make Hannah one, too. For Hannah's, I used an 'E' hook and sort of winged it. Here is Hannah as a 'rock star' as Darth Monkey calls her in the sunglasses.
The outfit and sunglasses are actually from Build-A-Bear. Someone gave me a gift certificate at the nerdlet's baby shower and I finally got around to spending it this week. The cashier was skeptical when she saw the date on it and I told her it hadn't been used, but the full credit was in there. I chose the brave dress because the bear cub loves Merida.
Here is a glimpse of her meeting Merida at Disney and you can see how happy she was about it. The outfit came with a wig, too, but the bear cub was not interested in keeping that on Hannah (though she did wear it herself for a while).
I may make one more of these hats for the drama princess, but it's kind of a wait and see since I didn't purchase any yarn for hers.
Subscribe to:
Posts (Atom)