Sunday, July 22, 2012

The Haircut

Look what the nerdlet did to my head last night.  Just kidding, I let Q cut my hair late Friday night and this is an interim shot.

 This is my before.  It really isn't what I was looking like though because I brushed and brushed it to get as much curl out as I could before he cut it so it would be easier.

And this is the final result.  I really like it.  This is the second time I've done this, but the first time was in college and my hair was already pretty short so it was a bigger shock to me now.  Now that it has been almost two days, I've gotten comfortable with it and I really like it.

Tuesday, July 17, 2012

Bird Inspiration

Amethyst Starling


Emerald Starling


These are two of my favorite birds right now.  Someday, I plan on printing out the list of birds they have at the zoo and trying to see if I can find them all.

Sunday, July 15, 2012

Painting the car

When the nerdlet was a little over a year, we inherited a Little Tikes Cozy Coupe from her cousin, which she had inherited from her cousin, which probably wasn't new when he got it.  You can see the spotted plastic here.  
Isn't the nerdlet cute here?  She's 20 months here.

We have since at birthdays for the bear cub and Darth baby acquired two new ones, one in red and yellow and one in pink and white.  They are in pristine condition as Grandma Elmo purchased them new for them.  So each time we pull out the cars, the nerdlet always wants to drive their cars instead of her own.  I decided to paint hers in an attempt to make her happier with it.  I used Rustoleum plastic paints from Joann's using the 40% off coupons.  I didn't prime her car, but I highly recommend  that you do, especially for a rough use item like this as the girls have already scraped off paint in a few areas.

I painted the base of the car French Lilac.

The top was painted Green Apple.

While it isn't perfect, it came out much nicer than it was originally.

What I didn't expect was a three way fight over the newly painted car (only two of the fighters are present in this photo).


Wednesday, July 11, 2012

Simplicity Bias Tape and Piping Maker

I've been eyeing it for a while, but since they are 50% off at JoAnn's right now and Q was telling me I should get one before the sale ended, I did.  I was skeptical because I don't really care for the gadgets that they make for them and most often just end up pressing it without one and I wasn't sure this would get used unless it made a perfect fold.  I've been sold now though.

You can turn over 22 yards of bias strip into single fold bias strip in less than 30 minutes, and it took me less than 2 hours from starting with the cutting to this finished roll of single fold tape.

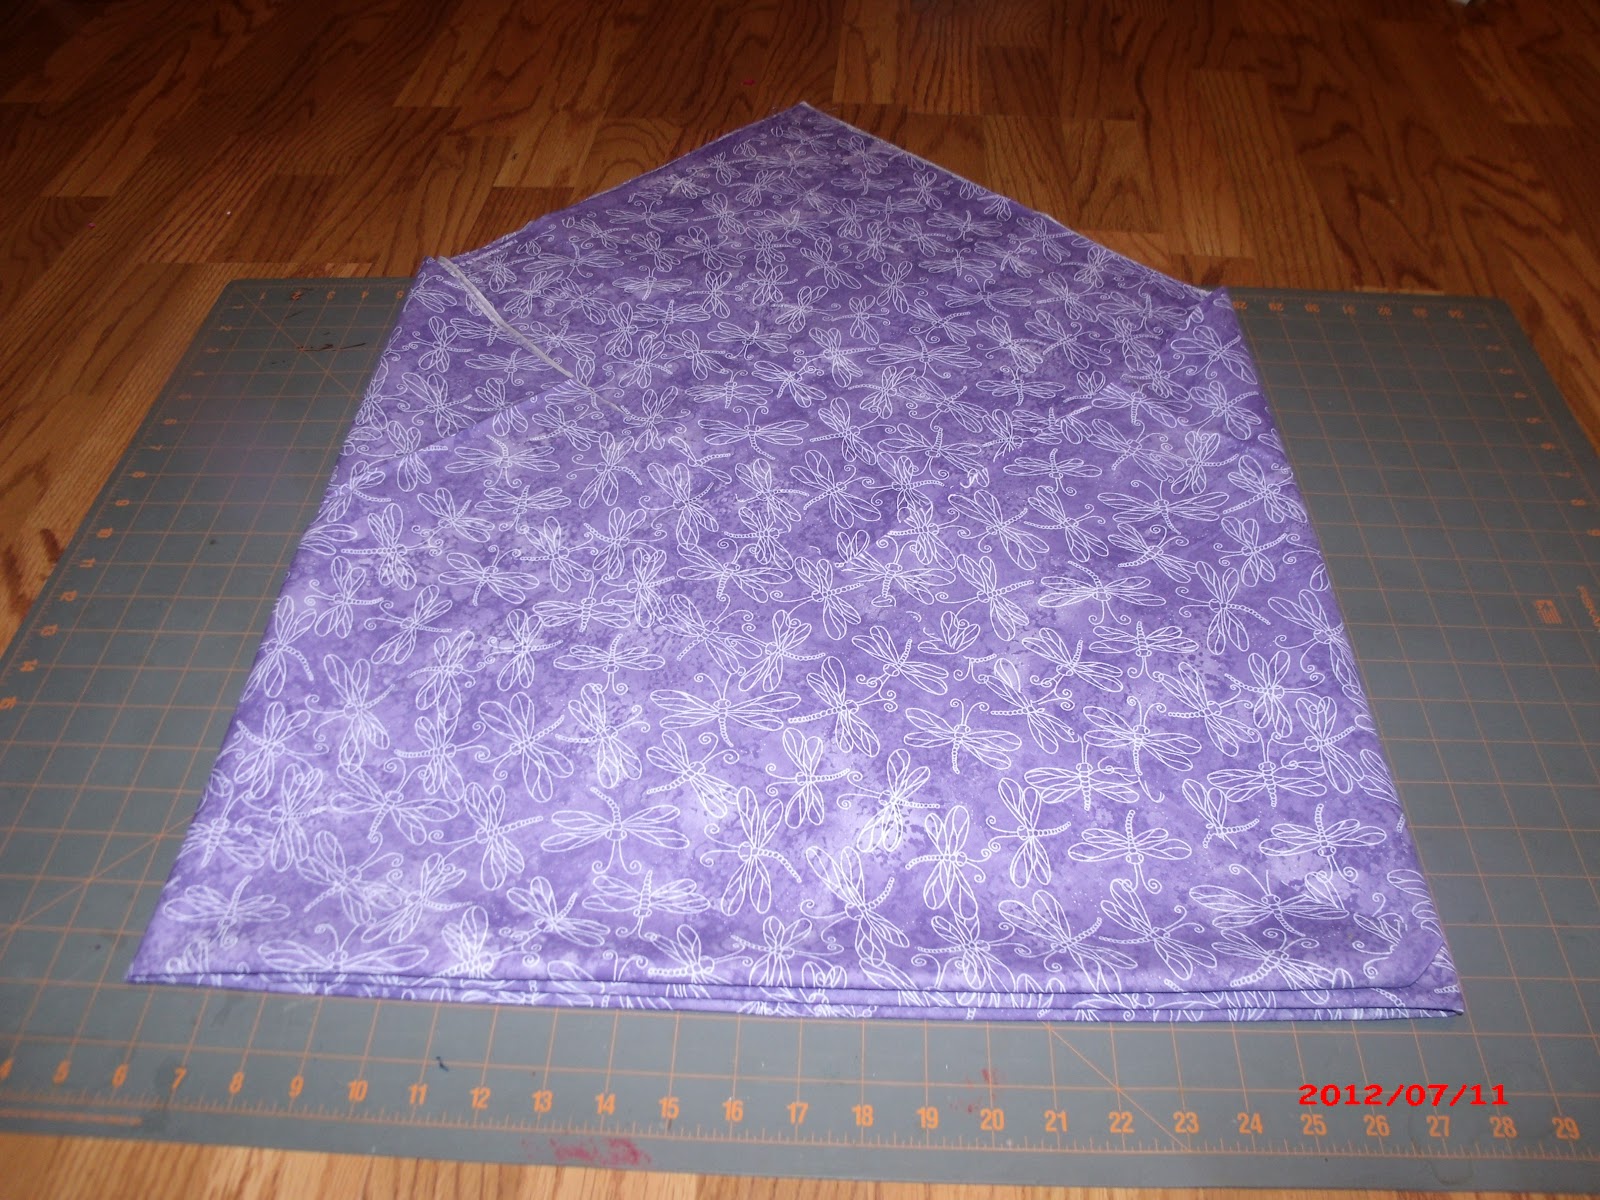
I'm starting with how I make bias strips first.  Most quilters and a lot of people that sew have made bias tape and everyone has their favorite method.  This is mine.  I buy 1 1/4 yards of fabric and fold it into a triangle.  Trim the edges.

With the fold facing me, I bring one corner over 1/3 of the way.

Then I bring the other corner over the the fold so that it is even with the other folds.

I'm cutting 2 inch strips because the single fold default that comes with the machine is 1 inch and also, that is pretty much what I use on most everything.  I start by cutting 1 inch from the fold (because it is doubled over so will end up being 2 inches).

All subsequent cuts are two inches.

I usually end when it just seems ridiculous to sew on that length because the strip has become so small.

Then right sides together with the two pieces meeting at 90 degrees, I overlap them so that there is 1/4 (or the same length of the seam I am sewing) where the two pieces meet.

I just sew them one after another without backstitching at all (since the seam will be encased when I sew it only the final product).

At the end I have what looks like streamers I cold hang.  I cut the thread between segments and trip the seams to be straight where the strips meet.

You start wrapping the end with the right side facing out placing it under a clip.

When pointing downward, the end of the strip comes out of the right back side.

Place the spindle on the machine.  This much bias tape will not lay where the spindle is supposed to lay so I have it rigged slightly higher.

Then you lay it over a piece that my machine was missing when I bought it today (I'll go back for it) and thread it through the folding gadget.

Snap the folding gadget in.

Pull the strip through the heating element and roller.

Snap the top piece on.

Press the run button.  Here is a short video of this in action.  When I'm not taking a picture of it, I'm using my right hand to replace the missing guide and am wrapping the tape around the roll there with my left.

Here is what the other side looks like.  It looks great.

Then I had the idea that I could use the machine to make double folded tape even though there aren't any instructions to do so.  I pushed the tape off the roll back onto the spindle.


 I placed the spindle back on the machine.  It is even taller this time so I had to do some major rigging.  Then I put it over the guide (still missing, but replaced with a marker now) and pulled over the heating element and roller.

I replaced the top part.

Turned it on and pressed run.  For this I used my right hand to fold the tape in two and my left to keep in even as it passed through the iron part.

Another 30 minutes and I had over 22 yards of double fold bias tape.

If you use a lot of bias tape and make your own, this machine is a big time saver.  The cutting a prep part will take the same amount of time, but the folding and ironing of the bias strips into tape has been reduced by 4 to 5 times.

Sunday, July 8, 2012

Ottobre 4/2011 - 14 Cranberry

I don't often buy clothing for my girls.  It has to be a really, really good deal or an immediate dire need.  I bought this one dress at Sears for $1.50 in their clearance section that I really love and put the bear cub in pretty much every time it comes out of the wash.

She's been wearing it for some time now and has recently jumped a growth curve so it has gotten quite short on her.  You can't really tell just how short in these pictures, but I know it's not long until I won't be able to have her in it any more.

I decided to make her another one, but in patriotic colors.  I started with the Ottobre pattern 4/2011-14 and made a few changes.  I redrew the front yoke to be larger and split into two colors.  I redrew the back to be split the same way between the two colors.  I removed the large bow and added trim to the bottom of the dress all the way around.  I added a belt and ties and a small bow. Here is what I ended up with.
I think it turned out really cute, but Q thinks that the white fabric with the stars is too busy.  I bought fabric for two patriotic versions, the next one more red based than blue so there will be another one shortly.  I don't think I made it long enough.  It is about an inch longer than the one above and I think it will be outgrown way too quickly so I'll be adding more length to the bodice and skirt in the next version.  I also still need to try it on the bear cub so it may need further adjustments.  Overall, despite the lack of enthusiasm from Q, I'm super pleased with how it came out.


Friday, July 6, 2012

Ottobre 4/2011 - 5 Viviella

I planned this dress out a months ago for the bear cub at school.  She needed clothing that she could wear with a shirt underneath and a sweater over her since it was so much colder on the bus and in the classroom than at home and outside.  I ended up not making it because I was intimidated by the idea of shirring.  Since I have since mastered shirring and my backup machine is set up to do that right now, I figured I would knock this one out.

I had to bribe the bear cub to sit still so I could take pictures of her.  The fabric is a very fine corduroy that is perfect for this.  I made the 80 and original drew the pattern to be the length of a 92, but when I cut it out I cut out an extra four inches in length so that the nerdlet could wear it and the bear cub could likely get a couple of years of wear out of it.  It currently comes down halfway down her calves, but I'm okay with that.  Oddly, the nerdlet wouldn't try it on this time.

I really like this pattern and if I had any more fine cord in my stash, I'd likely make a few more in a length that is more appropriate for running around.

Thursday, July 5, 2012

More bibs

So now I have 3 sizes of bibs that I make:  Newborn - 6 months(16-20 inch chest), 18-24 months(22-24 inch chest), and 24-36 months(24-26 inch chest).

I was/am still using the newborn sized bibs on my 3 girls, they are a little snug on Darth Baby and a little short on the nerdlet, but still wearable and functional.

As I wrote in my previous bib post, my cousin's granddaughter wears a normal 2T and these little bibs were a little snug on her so I made a slightly bigger pattern for her.  Since the smaller of the two fit her well, I made a bunch more, both for my girls, her, and a couple for a friend that is going to have twins.

These bibs were made from 13 inch wash cloths from Costco (12 for less than $8.00), and I'm considering picking up another package because while these bibs are a lot of work for just a bib, they really are great.  I made what felt like miles of yellow bias tape for these bibs and the nerdlet asked me if I was making Big Bird.  I love that she thinks that I can just make anything that pops into her head.

For those that think that they have husbands that are supportive of their craft, I have this little story for you.  Q knows that I really dislike making bias tape and he always asks how he can help me when I start the process.  This time Q said that I should just show him how to make it so that he could make me a bunch in every color and not have to worry about it anymore.  He offered this when he sees how long it takes and what it entails (since I do almost all of my sewing and cutting in the kitchen in his presence).  I thought that was really sweet of him.

I'll leave you with a picture of the nerdlet in the big she picked out for herself, which is clearly a bit big (her chest measurement is under 19 inches).