
Wednesday, January 14, 2015
Tuesday, January 13, 2015
McCall's 2149 Versions 6-9
McCall's 2149 Version 6

McCall's 2149 Version 7

McCall's 2149 Version 8

McCall's 2149 Version 9

Q loves these last two and wears them again as soon as they come out of the wash. I've got 8 more of these shirts cut out on my counter waiting for me to sew them up so you may sew more versions in the near future.
A Step By Step Tutorial of the Collar McCall's 2149
I haven't really gone back and posted things that I missed posting about when I made something, but I am going to here since I took pictures of making McCall's 2149 step by step as a tutorial for beginners when making this mens shirt. It is really a simple shirt esp. if you don't add pockets, which Q doesn't want anyway. Pockets aren't that difficult to add, though, if you want to do so.
First is the collar. I made this with 3 other shirts and in doing so I did two with the interfacing on the bottom piece and two with it on the upper piece. I didn't really see a significant difference at the time. I just ran upstairs to check on these shirts and now you cannot even tell which side is interfaced without pulling the collar apart. So while I have read advice telling me both different ways, I wouldn't worry about it. Pick the side you like. Here I have the interfacing on the upper collar piece. Sew around the sides and top of the collar and clip the corners off.

Then I use the rotary cutter to trim all around the sewn sides.


Then flip it around and press.

I use a pin to gently pull out the corners so they come to a point.

Then I pin the lower collar piece to the right side of the shirt, where the two front pieces have already been sewn to the back. This is one of the few places that I actually use pins and I'm rather generous with them.

I pin the collar so that it meets right up to the edge of the collar.

Then I sew right to that edge.


Then I sew along the inside (the side that will be away from the button holes).


I then flip it around and press, fusing the interfacing to the facing.

I then sew this piece to the shirt front pieces.

I sew carefully when I get to the collar to capture the lower piece of the collar.

I stop at the point of meeting the collar so that I can enclose the facing in the collar. Then like before I trim the facing and corner.

Then I flip it around and press, again using a pin to gently pull out the corner to a point.


I fold them back together and zigzag over the seam while meeting them up exactly.

The finished shirt.

Here you can see the topstitching of the shirt around the collar and also if you click on the picture to enlarge it, you will see the zigzag. If I have chosen a contrasting thread for the topstitching, I will choose the best blending thread for the zigzag.


I'll follow this post with another post with pictures of the other 3 shirts I made in June.
Sunday, January 11, 2015
Globetrotting - Another Pat Sloan BOM
So after completing my two versions of Pat Sloan's current BOM, I started contemplating her last BOM for 2014, the Globetrotting Quilt. Being the person I am, I went ahead and put off sewing the stack of shirts for Q that I already cut out and completed the first BOM for the Globetrotting Quilt.
First I'd like to show you my stack of fabrics.

So I based these colors off of the blue fabric second from the top. I made this into a dress a year and a half ago for my girls. I love this fabric and likely I will take the dress apart and use the fabric in something else when it becomes too small for the bear cub. Because I love it so much I tried to figure how it could be best used in the quilt with so little of left (without cutting up the dress).

So I decided to use it as the center of the center block.

I know that it is really, really loud, but I still like it. I've put away all the extra fabric so that I will at least make one of the shirts I have planned for Q before I start working on more of the blocks.
First I'd like to show you my stack of fabrics.
So I based these colors off of the blue fabric second from the top. I made this into a dress a year and a half ago for my girls. I love this fabric and likely I will take the dress apart and use the fabric in something else when it becomes too small for the bear cub. Because I love it so much I tried to figure how it could be best used in the quilt with so little of left (without cutting up the dress).
So I decided to use it as the center of the center block.
I know that it is really, really loud, but I still like it. I've put away all the extra fabric so that I will at least make one of the shirts I have planned for Q before I start working on more of the blocks.
Saturday, January 10, 2015
Another Vacation Block
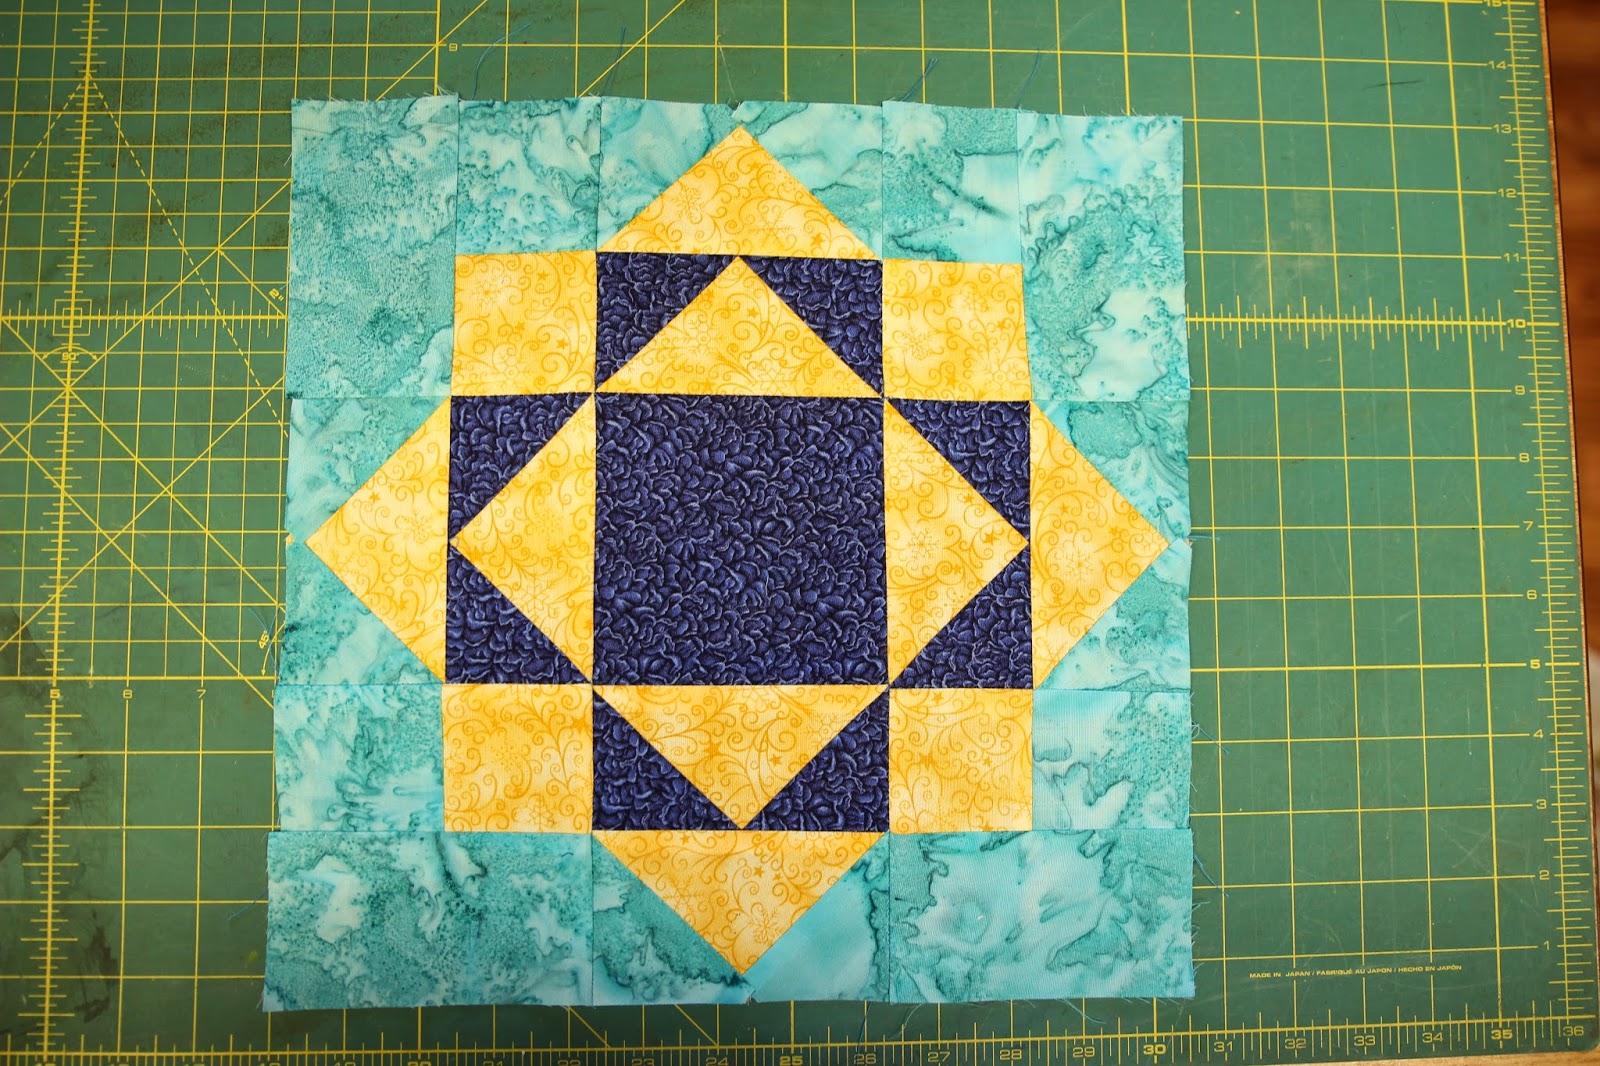
I belong to a facebook group by Pat Sloan, the quilter that is doing the block of the month that I just made in my last post. One of the members, Melinda Pulling-Goodernote, made this beautiful block and posted it in the group last night. I like it so much that I decided to make it myself. I especially liked that it is open to paper piecing.

This is the paper pattern that I drew up immediately after seeing it. I made one of the long middle piece, 2 of the flying geese combo, and 4 of the squares.

I had already started considering making another quilt using the BOM and had picked out these fabrics for it.

The center long piece

All the pieces.

The center and two sides.

And the completed 12.5" block. I really love the way paper piecing gives you perfect corners.
Thank you so much, Melinda Pulling-Goodernote, for making and sharing this beautiful block.
Saturday, January 3, 2015
Pat Sloan's 2015 Vacation Time BOM Block 1
I decided to do my first block of the month quilt. It is Pat Sloan's 2015 Vacation Time block of the month quilt. I sort of wanted to use Pat Sloan's fabric but by the time I decided to purchase them, none of the stores online had them all and I didn't want to make a huge string of purchases, so I decided to buy other fabrics locally. I chose colors based on the nerdlet's current preference for all things that are blue and pink. I purchased the fabrics today.

This pic is missing two fat quarters that I bought - one blue and one green, and I have already swapped the darkest blue for a slightly lighter blue from my stash.
I already finished the first block.

I cut the fabrics without any regard to direction and I modified her pattern so that all the squares were one piece instead of multiple pieces. So far I am resisting the temptation to redo the block to turn the pink and the floral so that they are all pointed the same way and to be more particular about my corners. Right now, I am thinking that I won't redo it but that I will pay more attention during the rest of the blocks.
This pic is missing two fat quarters that I bought - one blue and one green, and I have already swapped the darkest blue for a slightly lighter blue from my stash.
I already finished the first block.
I cut the fabrics without any regard to direction and I modified her pattern so that all the squares were one piece instead of multiple pieces. So far I am resisting the temptation to redo the block to turn the pink and the floral so that they are all pointed the same way and to be more particular about my corners. Right now, I am thinking that I won't redo it but that I will pay more attention during the rest of the blocks.
Subscribe to:
Posts (Atom)